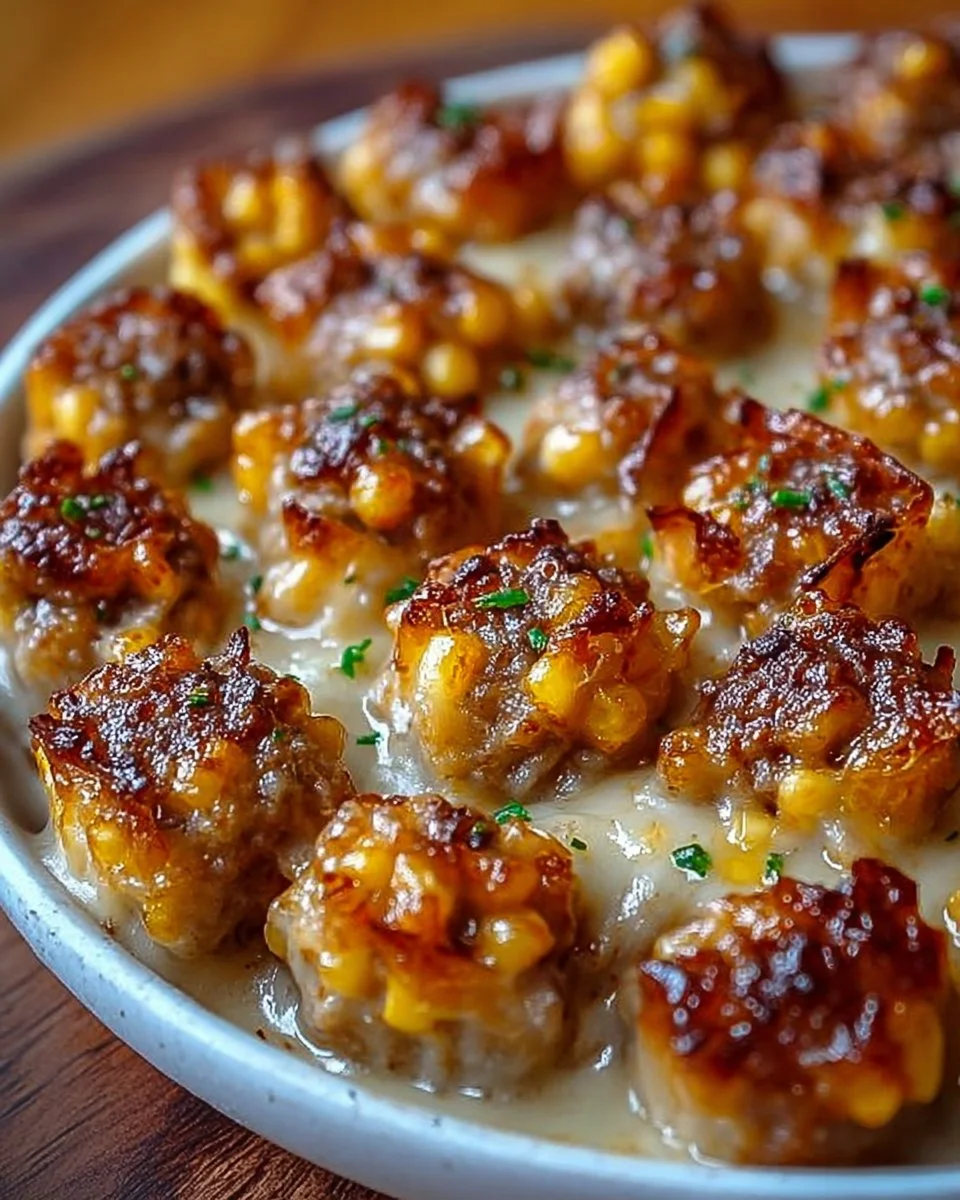
Each bite of a crispy party bite takes you on a joyous flavor journey, where the harmony of textures meets a symphony of tastes. Picture this: you sink your teeth into a golden-brown pastry—crunchy, flaky, and warm—releasing an aromatic steam that carries hints of savory seasoned meat and melted cheese. As your palate rejoices, the satisfied crunch gives way to a delightful creamy filling that dances playfully with every morsel. The red peppers and onions pop with freshness, adding a hint of sweetness that balances the richness perfectly. These morsels aren’t just food; they’re flavor-packed treasures meant to be shared, savored, and enjoyed with loved ones, making every gathering instantly a festive occasion.
The air fills with enticing aromas as they bake, teasing your senses and igniting your anticipation. Friends and family gather, drawn to the kitchen, where you proudly present your platter of crispy party bites. The way they shimmer with a golden glaze beckons, whispering promises of comfort and satisfaction. Each bite is a celebration in itself—a delightful escape from the mundane into the realm of deliciousness. Whether served as an appetizer, a party snack, or a delightful treat at a cozy game night, these crispy party bites enchant everyone, making them irresistible to both young and old alike.
Why You’ll Love This Recipe
What makes crispy party bites a standout dish is their incredible versatility and inviting flavor. You can customize these delightful treats to suit any occasion, be it a lively birthday celebration, an intimate game night, or a potluck with friends. The unique combination of crispy pastry enveloping a rich filling ensures that every bite explodes with flavor. You can switch between ground beef, chicken, or even lentils, catering seamlessly to various dietary preferences, including vegetarian options. And let’s not forget the cheese—its gooeyness adds a decadent richness that will have everyone reaching for seconds!
Not only do they taste heavenly, but crispy party bites come together quickly, making them perfect for impromptu gatherings. With minimal prep and straightforward cooking, you can whip up a batch in no time at all, ensuring that deliciousness is always just a few steps away. Each freshly baked piece carries warmth and comfort, evoking fond memories tied to gatherings around the table. It’s the kind of dish that sparks joy, igniting conversations and laughter as everyone revels in the simple pleasure of good food.
Preparation Phase & Tools to Use
Before diving into the crispy party bite adventure, ensure you have the right tools at hand. Having the right equipment not only simplifies the cooking process but also enhances the results.
-
Mixing Bowl: A large bowl is essential for combining your filling ingredients effortlessly. Opt for a bowl that can accommodate all components without overflow.
-
Rolling Pin: This tool helps to evenly roll out the pastry, creating the perfect bases for your crispy bites. An even thickness ensures consistent cooking.
-
Baking Sheet: Choose a sturdy baking sheet lined with parchment paper. This prevents sticking and promotes an even, golden crispness.
-
Fork: A simple yet crucial tool for sealing your bites. This prevents the filling from escaping as they bake and gives them a charming decorative edge.
-
Pastry Brush: Use this to apply the egg wash before baking, achieving that mouthwatering golden finish.
With your tools ready, prepare your ingredients with care. Ensure everything is chopped and measured out ahead of time, allowing for a smooth preparation experience.
Ingredients for Crispy Party Bites
Gathering the right ingredients transforms your crispy party bites from a simple recipe into a culinary delight. Here are the essential components:
-
Ground Beef, Chicken, or Lentils: These proteins form the heart of your filling. Each option brings its unique flavor profile. Lentils offer a delightful earthiness for vegetarian enthusiasts, while beef or chicken creates a classic hearty bite.
-
Shredded Cheese: Cheese binds everything together, adding creaminess. Choose mozzarella for its stretchiness, cheddar for a sharp contrast, or pepper jack for a bit of heat.
-
Bell Peppers or Onions: Fresh, chopped vegetables add color and crunch. Customize with your favorites to enhance flavor balance; consider using colorful bell peppers for a vibrant presentation.
-
Puff Pastry or Phyllo Dough: This is what creates the crispiness that makes these bites so addictive. For a gluten-free option, explore using rice paper wraps.
-
Egg Wash: This simple mixture of beaten egg and water gives your bites their signature shiny finish, resulting in an inviting outer layer.
By knowing your ingredients and exploring substitutions where necessary, you create a dish that can be tailored to your taste and dietary needs.
How to Make Crispy Party Bites
Creating crispy party bites is easier than you might think! Follow these simple steps:
-
Prepare the Filling: In a mixing bowl, combine your chosen protein with the shredded cheese and mix in your chopped vegetables. Get creative and feel free to add spices or herbs for an extra flavor kick. Let everything meld together for about 10 minutes while you enjoy the delightful aroma.
-
Preheat the Oven: Set your oven to 400°F (200°C). Preheating ensures that your bites cook evenly and achieve that coveted golden color.
-
Assemble the Bites: Roll out your pastry on a lightly floured surface to avoid sticking. Cut out squares or circles, depending on your presentation preference. Place a spoonful of the filling mixture in the center of each piece, being careful not to overfill.
-
Seal the Edges: Fold the wrapper over the filling and press the edges together with your fingers, then seal with a fork for that classic decorative touch. This sealing method also keeps the filling snug inside.
-
Bake: Place the bites on your prepared baking sheet lined with parchment paper. Brush the tops with egg wash to give them a lovely sheen. Bake for 15-20 minutes until they turn a golden-brown hue, filling your kitchen with heavenly aromas.
-
Serve Warm and Enjoy: Once they’ve cooled for just a minute, dive in! Serve with your favorite dipping sauces for an enriched experience.
Chef’s Notes & Helpful Tips
-
Make-Ahead Tips: Prepare your filling and fillings a day in advance. Assemble your bites and store them on a baking sheet in the fridge until you’re ready to bake. This makes hosting a breeze!
-
Cooking Alternatives: If you’re short on time or prefer a different method, try using an air fryer. Preheat it to 375°F (190°C), arrange the bites in a single layer, and cook for about 10 minutes for every batch—super crispy and quick!
-
Customization Ideas: Don’t hesitate to play with flavors! Add cooked bacon for a smoky touch, or mix in herbs like thyme or rosemary for a sophisticated twist.
Common Mistakes to Avoid
When making crispy party bites, avoiding common pitfalls can elevate your experience. Here are a few mistakes to steer clear of:
-
Overfilling: It’s tempting to pack in more filling, but overstuffed bites can burst while baking, spilling deliciousness everywhere. Stick to a modest spoonful for perfect results.
-
Rushing the Seal: Ensuring a proper seal is crucial. If the edges aren’t pressed together firmly, your filling may leak out during baking. Take your time to ensure the edges are sealed tightly.
-
Neglecting the Egg Wash: Without an egg wash, your bites may come out pale and uninviting. Always brush the tops for a beautiful finish!
What to Serve With Crispy Party Bites
Pairing your crispy party bites with complementary dishes enhances the overall experience. Consider these delightful accompaniments:
-
Dipping Sauces: Think tangy marinara or spicy salsa for a burst of flavor that perfectly contrasts the richness of your bites.
-
Fresh Salad: A light, zesty salad can balance the richness of the bites. Cucumbers and a citrus vinaigrette make a refreshing contrast.
-
Charcuterie Board: Serve your crispy party bites alongside a vibrant board filled with cured meats, cheeses, and pickles for a feast that delights the senses.
-
Fruit Platter: A colorful platter of fresh fruit adds a juicy, refreshing counterpoint, elevating the snack experience.
-
Roasted Vegetables: A side of roasted seasonal veggies brings warmth and rustic charm to the table.
-
Sparkling Beverage: A fizzy drink, whether it’s a fruity soda or a sparkling water with citrus, will quench thirst while bringing a celebratory vibe.
Storage & Reheating Instructions
If you find yourself with leftovers (which is rare, given how delicious they are!), store your crispy party bites properly to maintain their crunch.
-
Fridge: Store bites in an airtight container in the refrigerator for up to 3 days. Reheat in the oven for a few minutes to regain the crunchiness.
-
Freezer: For longer storage, freeze the assembled, uncooked bites in a single layer until firm, then transfer to a freezer bag. They last for about 2-3 months. Bake straight from frozen, adding an extra 5-10 minutes to the cooking time.
Estimated Nutrition Information
While each bite is packed with happiness, here’s an approximate breakdown of nutrition per serving (about 3 bites):
- Calories: 180
- Protein: 8g
- Carbohydrates: 15g
- Fat: 10g
- Fiber: 1g
(Disclaimer: Values vary based on the exact ingredients used. Consider personal dietary needs when enjoying this recipe.)
FAQs
Can I use a different type of meat?
Absolutely! Ground turkey, pork, or even plant-based meat alternatives work wonderfully in this recipe. Just adjust cooking times if necessary.
Can I make these bites gluten-free?
Yes! Opt for rice paper wraps or gluten-free puff pastry, which will still deliver that delightful crunch you love!
How can I make these bites spicier?
Introduce diced jalapeños into your filling or substitute pepper jack cheese for an extra kick.
Can I bake these in advance?
Yes! You can bake them up to a day ahead of time. Just reheat in the oven until warmed through for a crispy finish.
What if I don’t have an oven?
If you have an air fryer, it’s a great alternative! You can achieve a similar crispy texture without preheating an oven.
As you embark on this culinary adventure, remember that crispy party bites aren’t just a recipe; they symbolize togetherness, joy, and delicious memories in the making. The blend of flavors and textures offers not just a meal, but an unforgettable experience that brings family and friends together. So, prepare your kitchen, gather your loved ones, and let the tantalizing aroma of culinary bliss fill your home. Embrace the magic of crispy party bites, and let each shared morsel weave stories of laughter and love around your table. You won’t just create a dish; you’ll make memories worth cherishing. Ready your taste buds for this delightful journey ahead!
Print
Crispy Party Bites
- Prep Time: 15 minutes
- Cook Time: 20 minutes
- Total Time: 35 minutes
- Yield: 12 servings
- Category: Appetizer
- Method: Baking
- Cuisine: American
- Diet: Vegetarian (if using lentils)
Description
Delightful and customizable crispy party bites packed with flavor, perfect for any gathering.
Ingredients
- Ground Beef, Chicken, or Lentils
- Shredded Cheese (mozzarella, cheddar, or pepper jack)
- Bell Peppers or Onions (chopped)
- Puff Pastry or Phyllo Dough
- Egg Wash (1 beaten egg mixed with water)
Instructions
- Prepare the filling by combining your chosen protein with shredded cheese and chopped vegetables. Let it meld for about 10 minutes.
- Preheat your oven to 400°F (200°C).
- Assemble the bites by rolling out your pastry and cutting it into squares or circles. Place a spoonful of filling in the center.
- Seal the edges with your fingers and a fork to keep the filling snug inside.
- Bake on a parchment-lined baking sheet for 15-20 minutes until golden brown.
- Serve warm with your favorite dipping sauces.
Notes
Make ahead by preparing filling a day in advance. Use an air fryer for a quick cooking alternative.
Nutrition
- Serving Size: 3 bites
- Calories: 180
- Sugar: 1g
- Sodium: 250mg
- Fat: 10g
- Saturated Fat: 5g
- Unsaturated Fat: 3g
- Trans Fat: 0g
- Carbohydrates: 15g
- Fiber: 1g
- Protein: 8g
- Cholesterol: 30mg