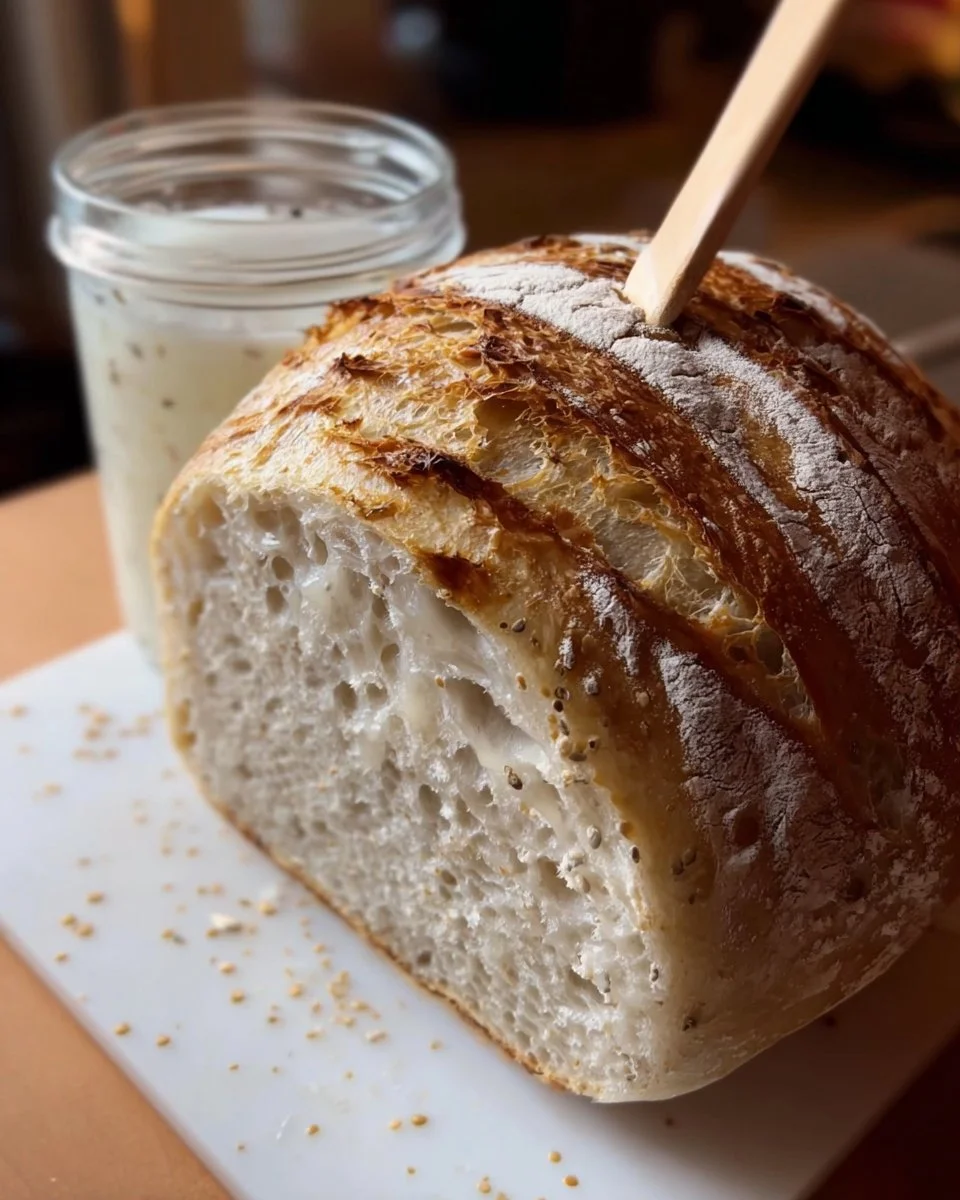
When you first encounter the art of sourdough bread-making, you find yourself enchanted by the allure of a bubbly, tangy, homemade starter. The mere act of nurturing this living culture transforms the kitchen into a sanctuary of warmth and creativity. As whisking aromas swirl through the air, the excitement of watching your starter bubble and grow soothes the soul. When it reaches its peak, it’s brimming with potential, a magical concoction that promises delightful loaves with a crusty exterior, airy crumb, and a flavor that dances on your tongue.
Imagine taking your first bite of freshly baked sourdough bread, the crust crackling under the pressure of your teeth. The chewy texture envelops your mouth, while the tanginess brings forth a burst of flavor that is simply irresistible. Each loaf tells a story of patience, love, and the entrancing fermentation process that brings simple ingredients to life. Crafting your own sourdough starter invites you into a world where homemade bread becomes not just food, but an experience filled with joy, tradition, and the satisfaction of creating something truly beautiful.
Why You’ll Love This Sourdough Starter
Creating a sourdough starter is a transformative journey brimming with benefits. First and foremost, the flavor—oh, the flavor! With each fermentation, your starter grows richer and more complex, adding an unmatched depth to all your baked goods. The tanginess that comes through in the final bread is simply sublime, taking everyday toasts and sandwiches to new culinary heights.
What makes sourdough so special is its versatility. With a well-fed starter, you can bake an array of treats, from classic loaves to pancakes, waffles, and even pizza dough—all infused with that delightful sourdough essence. Special occasions, quiet mornings, or cozy gatherings become even more memorable when sharing freshly baked sourdough treats, filling the air with warmth and delight.
Preparation Phase & Tools to Use
To embark on this magical journey, gather a few essential tools that will help you create your sourdough starter with ease:
- A Clean Glass Jar: A transparent vessel allows you to observe the fermentation process. Choose one with a wide mouth to make stirring easy.
- A Mixing Spoon: Use a wooden or silicone spoon to mix your flour and water; these materials won’t react with your starter.
- A Kitchen Scale: Precision is key in sourdough. A scale ensures you achieve the perfect flour-to-water ratio, making the process more reliable.
- A Cloth or Loose Lid: Covering your jar helps maintain ideal humidity levels while allowing the wild yeasts to breathe.
As you gather these tools, settle in with a cup of tea or coffee, and prepare to embark on an exciting adventure in bread-making.
Ingredients for Sourdough Starter
Here’s what you need to cultivate your very own sourdough starter:
- 100g unbleached all-purpose flour: This flour provides the necessary nourishment for your starter. You can also use whole wheat flour for a nuttier flavor and a boost in wild yeast, though be aware that it may ferment faster.
- 100g filtered room temperature water: The water helps create a conducive environment for yeast growth. Avoid chlorinated tap water, which can hinder fermentation.
Each ingredient plays a critical role in setting the stage for your starter to flourish.
How to Make Sourdough Starter
- In a clean glass jar, combine equal parts of flour and water—100g each. Stir until no dry lumps remain, and the mixture takes on a thick, pasty texture.
- Cover the jar loosely with a cloth or lid, allowing air to circulate while keeping out unwanted debris.
- Place the jar in a warm area, ideally between 70°F to 80°F (21°C to 27°C), and let it rest for 24 hours.
- Each day, feed your starter by adding equal parts flour and water, stirring well to ensure that the mixture is properly combined. This feeding process is vital for its growth and development.
- Watch closely as, after several days, the starter bubbles and develops a pleasant sour aroma, signaling successful fermentation.
- Once it doubles in size within 4 to 6 hours after feeding, your starter is ready to work its magic in baking!
Tip: Don’t rush the fermentation process; nature has its own timeline, and patience is key!
Chef’s Notes & Helpful Tips
- Make-ahead Tips: You can prepare your starter a week in advance and keep feeding it on schedule. Just remember that the longer you let it sit, the stronger the sour flavor will become.
- Alternate Cooking Methods: While most people use conventional ovens for baking, consider trying an air fryer for smaller batches of sourdough bread or a Dutch oven on the stovetop for that classic artisanal crust.
- Customization Ideas: Want to create a unique twist? Experiment by adding herbs, spices, or even a touch of honey to your dough for an extra layer of flavor!
Common Mistakes to Avoid
Crafting a sourdough starter can be a delicate process, and sometimes things don’t go as planned. Here are some common pitfalls and how to avoid them:
- Using Cold Water: Always use room temperature or lukewarm water; cold temperatures slow down fermentation.
- Forgetting to Feed: Regular feeding is essential for a healthy starter. If you miss a day, don’t panic; just feed it again and wait for a response.
- Lack of Patience: Every starter develops at its own pace. Rushing the process can lead to a disappointing outcome. Allow yourself to enjoy the journey!
What to Serve With Sourdough Starter
Once your sourdough starter is bubbling and thriving, the culinary world opens up before you. Consider these delightful pairing ideas:
- Artisan Sourdough Bread: The classic choice—dark golden crust with a chewy, airy crumb.
- Sourdough Pancakes: Fluffy and tangy, ideal for Sunday brunch topped with syrup and fresh fruit.
- Sourdough Pizza: Create a flavorful base with that irresistible chew, supporting all your favorite toppings.
- Sourdough Toast: Simply luscious when adorned with avocado, poached eggs, or a spread of herbed cream cheese.
- Sourdough Waffles: Serve them warm with fruit compote for a delicious pop of flavor.
- Sourdough Crackers: These make for the perfect appetizer, crisp and flavorful, alongside cheeses and dips, presenting a delightful crunch with every bite.
- Sourdough Bagels: Add a chewy texture to your morning ritual, topped with everything seasoning for that classic flavor combo.
Storage & Reheating Instructions
Storing your sourdough starter is simple. If you plan to bake often, keep it in the fridge and feed it weekly. For longer periods without use, you can freeze it. Simply ensure it’s well-fed before freezing, then thaw it the day before you plan to bake. Always feed it after thawing to jumpstart its fermentation process.
Estimated Nutrition Information
While calculating nutrition can vary based on specific measurements and ingredients used, here’s an approximate breakdown per serving:
- Calories: 100
- Protein: 3g
- Carbohydrates: 21g
- Fat: 1g
This information should serve as a guideline only, as the actual values may vary based on final recipe adjustments.
FAQs
1. How long does it take for a sourdough starter to be ready?
It typically takes about 5-10 days for a starter to become strong and bubble up properly, but it can vary greatly based on temperature and the environment.
2. Can I use whole wheat flour instead of all-purpose?
Absolutely! Whole wheat flour can enhance flavor and increase the starter’s activity due to higher nutrient content.
3. What do I do if my starter smells bad?
A sour, tangy smell is normal; however, if it smells off, like rotten or putrid, it may not be thriving. It could be time to discard it and start anew.
4. Can I skip the feeding for a few days?
It’s not ideal, as your starter relies on regular feeding. If you forget, just feed it as soon as you remember and then resume your schedule.
5. How do I know if my starter is active enough to bake?
An active starter should double in size within 4-6 hours after a feeding and have plenty of bubbles throughout. A pleasant, sour smell means it’s ready for baking.
Creating your own sourdough starter is not just about making bread; it’s about inviting a piece of living history into your kitchen. Each bubble, each feeding, and every delightful aroma carries the spirit of fermentation that has defined our culinary heritage for centuries. So, take a moment, roll up your sleeves, and embrace the enchanting process of nurturing your very own sourdough starter. Your kitchen will soon become a haven of warmth and creativity, blessing you with heavenly loaves that can be shared, savored, and celebrated. Happy baking!
Print
Sourdough Starter
- Prep Time: 5 minutes
- Cook Time: n/a
- Total Time: 7 days
- Yield: 1 sourdough starter 1x
- Category: Bread
- Method: Culturing
- Cuisine: Global
- Diet: Vegetarian
Description
Create your own bubbly and tangy sourdough starter, the foundation for delicious homemade bread and other treats.
Ingredients
- 100g unbleached all-purpose flour
- 100g filtered room temperature water
Instructions
- Combine equal parts of flour and water in a clean glass jar, stirring until no dry lumps remain.
- Cover the jar loosely with a cloth or lid to allow air circulation.
- Place the jar in a warm area, ideally between 70°F to 80°F (21°C to 27°C), and let it rest for 24 hours.
- Feed your starter daily by adding equal parts flour and water, stirring well.
- Watch as the starter bubbles and develops a pleasant sour aroma over several days.
- Wait until it doubles in size within 4 to 6 hours after feeding, indicating it’s ready for baking.
Notes
Be patient with the fermentation process and remember that every starter develops at its own pace.
Nutrition
- Serving Size: 1 starter
- Calories: 100
- Sugar: 0g
- Sodium: 2mg
- Fat: 1g
- Saturated Fat: 0g
- Unsaturated Fat: 0g
- Trans Fat: 0g
- Carbohydrates: 21g
- Fiber: 1g
- Protein: 3g
- Cholesterol: 0mg