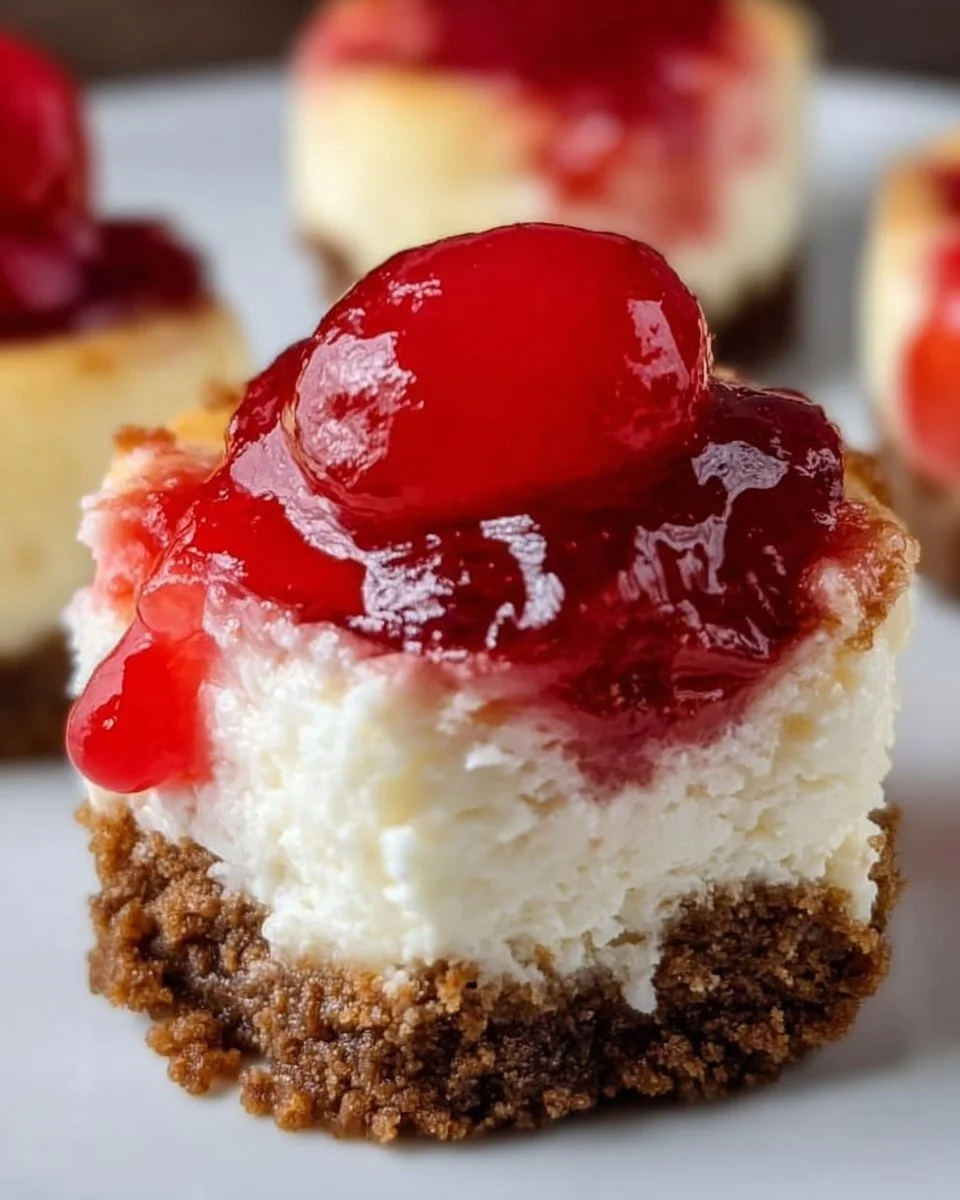
Indulging in a sweet bite that combines the richness of creamy cheesecake with the delightful burst of cherry topping is a little piece of heaven, isn’t it? Imagine sinking your fork through a delicate, buttery graham cracker crust, savoring the luscious cream cheese filling that melts in your mouth, all while the vibrant, juicy cherries add a pop of fruity brightness. Each mini cheesecake offers a perfect balance of flavors that dance on your palate, leaving you craving more. The aroma wafting from your kitchen while they bake beckons friends and family to gather around, eager for a taste of these delightful desserts.
These Mini Cherry Cheesecakes are not just treats for the taste buds but also for the soul. Picture the joy on your friends’ faces as they each unwrap their perfectly portioned cheesecake, ready to dive into that creamy bliss topped with sweet cherries. The experience of enjoying these little delights is simply unforgettable, whether they grace a festive holiday table, a cozy dinner, or a casual weekday indulgence. What makes these creations even more inviting is the sheer ease of making them—perfect for both novice and seasoned bakers alike.
Why You’ll Love This Mini Cherry Cheesecake
One deeply satisfying aspect of making Mini Cherry Cheesecakes is their versatility. Perfectly sized for a personal treat yet impressive enough for gatherings, these bite-sized wonders bring joy to any occasion. They showcase rich, velvety creaminess paired with the invigorating and tart cherry topping, ensuring every bite is a delectable experience. On a hot summer day, these mini cakes chill in the fridge, ready to refresh your guests at your backyard barbecue. On chilly evenings, they offer a warm, sweet escape that brings comfort and nostalgia.
Not only do they deliver on taste, but they also take mere minutes to prepare. With minimal fuss, you can pull together these delightful desserts and allow them to chill in the fridge while you enjoy other activities. Each creamy bite and crunchy crust speaks volumes of your culinary skills, making you the star of any celebration.
Preparation Phase & Tools to Use
Before diving into the realm of rich and creamy treats, gather a few essential tools for crafting your Mini Cherry Cheesecakes. Here’s what you’ll need and why each tool plays a significant role in your baking journey:
-
Muffin Tin: This forms the base structure of your cheesecakes, making them easy to pop out and serve. Opt for a non-stick tin, or line it well with foil wrappers for easy removal.
-
Mixing Bowls: You need at least two bowls—one for the crumb mixture and another for the cheesecake filling. Use glass or metal bowls for easy mixing and cleaning.
-
Electric Mixer: A handheld or stand mixer makes it simple to beat the cream cheese until perfectly smooth—no lumps permitted in this luscious dessert!
-
Spatula: This handy tool allows you to scrape the sides of bowls, ensuring all ingredients blend seamlessly.
-
Measuring Cups and Spoons: Precision is key for consistent results. Reliable measurements guarantee every batch turns out perfectly.
Preparation Tips:
- Keep your cream cheese at room temperature before mixing; it ensures a smoother, lump-free filling.
- Have all ingredients pre-measured and arranged—this streamlines the baking process.
Ingredients for Mini Cherry Cheesecake
To create your own delectable Mini Cherry Cheesecakes, gather the following ingredients:
-
½ cup unsalted butter (melted): This enriches the graham cracker crust, infusing it with a creamy depth.
-
1½ cups graham cracker crumbs: They provide the perfect crunch and a touch of sweetness in the crust.
-
16 ounces cream cheese (softened): Essential for that silky, rich texture, use full-fat cream cheese for the best results.
-
1 cup white sugar: This sweetens the filling, balancing the tanginess of the cream cheese.
-
2 large eggs: They help to bind the mixture, contributing to the creamy density.
-
⅓ cup sour cream: Adding tanginess and moisture, it enhances the creamy texture.
-
1 teaspoon vanilla extract: This adds a lovely aroma and flavor that complements the cherry topping.
-
1 tablespoon all-purpose flour: Helps stabilize the cheesecake to prevent it from cracking as it bakes.
-
1 can cherry pie filling: This sweet and fruity topping adds delicious texture and bright color.
For potential substitutions, consider using graham cracker alternatives like Oreos for a chocolatey twist or Greek yogurt in place of sour cream for a healthier version.
How to Make Mini Cherry Cheesecake
Let’s get baking! Follow these straightforward steps for creating your Mini Cherry Cheesecakes:
-
Preheat your oven to 350°F. This sets the stage for evenly baked cheesecakes.
-
Prepare muffin tins: Line 18 muffin cups with foil-lined wrappers. The foil lining makes it easier to peel them off later.
-
Create the crust: In a medium bowl, mix the melted butter with graham cracker crumbs until they resemble wet sand. Press about one tablespoon of this mixture firmly into the bottom of each cupcake liner, forming a solid base.
-
Craft the filling: In a large bowl, beat the softened cream cheese with the white sugar until smooth and creamy. Ensure to scrape down the sides periodically for an even mix.
-
Incorporate eggs: Add in the eggs one at a time, beating well after each addition.
-
Mix in the remaining ingredients: Blend in the sour cream, vanilla extract, and flour until everything is well combined and smooth.
-
Fill the cups: Spoon the cheesecake mixture into each lined cup, filling them about halfway (about ½ inch from the top). Remember, they will rise slightly during baking!
-
Bake: Place the muffin tin in the preheated oven and bake for 20 to 25 minutes. The cheesecakes are ready when the center remains just slightly jiggly.
-
Cool and chill: After baking, let them cool in the pan for 20 minutes before transferring them to the fridge. Chill for at least two hours, allowing their flavors to meld and the texture to firm up.
-
Top with cherries: Before serving, pile a spoonful of cherry pie filling on top of each cheesecake for that perfect finishing touch.
Tip: Rotate the muffin tin halfway through baking for an even cook.
Chef’s Notes & Helpful Tips
-
Make-ahead tips: Prepare these cheesecakes a day ahead of your event. They taste even better the next day, allowing the flavors to deepen.
-
Cooking alternatives: For a quicker version, use an air fryer. They’ll take about 15 minutes but keep an eye on them to prevent overbaking.
-
Customization ideas: Besides cherries, try topping with fresh strawberries, blueberries, or a drizzle of chocolate syrup for a unique twist!
Common Mistakes to Avoid
Avoiding a few common pitfalls can elevate your cheesecakes to perfection:
-
Overmixing: Be cautious when blending the ingredients to avoid incorporating too much air, which can lead to cracks.
-
Skipping cooling time: Patience is key—cooling the cheesecakes in the fridge provides a firm texture, making them easier to handle.
-
Overfilling: Filling the wrappers too full can lead to messy results; stick to the recommended height.
What to Serve With Mini Cherry Cheesecake
Pairing your delightful Mini Cherry Cheesecakes can turn a lovely dessert into an unforgettable finale. Consider serving them alongside:
-
Fresh Berries: A plate of assorted berries offers a refreshing contrast to the rich cheesecake.
-
Whipped Cream: A dollop of light, fluffy whipped cream adds a luxurious touch.
-
Chocolate Drizzle: A drizzle of warm chocolate ganache elevates the dessert experience.
-
Coffee: A warm cup of coffee pairs beautifully, enhancing the dessert’s sweetness.
-
Mint Leaves: Garnishing with fresh mint adds a touch of brightness to the presentation.
-
Vanilla Ice Cream: Serve warm cheesecakes next to a scoop of creamy vanilla ice cream for a dreamy treat.
Storage & Reheating Instructions
These delicious cheesecakes can be stored in several ways:
-
Fridge: Store covered in an airtight container for up to five days.
-
Freezer: For longer storage, freeze them after they have cooled completely. Place them in airtight containers or freezer bags, and enjoy them for up to a month.
-
Reheating: Thaw frozen mini cheesecakes in the fridge overnight and enjoy either cold or warmed gently in the microwave for a few seconds.
Estimated Nutrition Information
Per cheesecake (without cherry topping):
- Calories: Approximately 180
- Total Fat: 10g
- Saturated Fat: 6g
- Carbohydrates: 20g
- Sugars: 12g
- Protein: 3g
Please note that these values may vary based on ingredient brands and precise measurements.
FAQs
1. Can I make these cheesecakes gluten-free?
Absolutely! Substitute regular graham crackers with gluten-free alternatives or crushed nuts mixed with butter for the crust.
2. What can I use instead of cherry pie filling?
Feel free to use other fruit toppings like fresh raspberries, blueberries, or even a decadent chocolate sauce for a different experience.
3. My cheesecakes cracked during baking; what should I do?
Cracking can occur if the oven temperature is too high. Baking them at a lower temperature for a longer duration may prevent this.
4. Can I double the recipe easily?
Yes! Simply double all ingredients, use a larger muffin tin, and ensure you have enough chilling space in your refrigerator.
5. How do I know if my cheesecakes are done?
Look for a slight jiggle in the center. They will continue to set as they cool, ensuring a perfect consistency.
Conclusion
Indulging in Mini Cherry Cheesecakes is an experience that blends nostalgia with modern flair, capturing sweet moments shared with loved ones. As you take that first bite, let the creamy filling and crunchy crust whisk you away to happy memories. I invite you to bring this recipe into your kitchen, where the warm scents of baking and the joyful laughter of friends and family echo. Create your own delightful stories, one delicious cheesecake at a time. Happy baking!
Print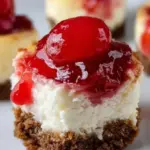
Mini Cherry Cheesecakes
- Prep Time: 15 minutes
- Cook Time: 25 minutes
- Total Time: 40 minutes
- Yield: 18 servings 1x
- Category: Dessert
- Method: Baking
- Cuisine: American
- Diet: Vegetarian
Description
Delicious mini cheesecakes topped with a vibrant cherry filling, perfect for any occasion.
Ingredients
- ½ cup unsalted butter (melted)
- 1½ cups graham cracker crumbs
- 16 ounces cream cheese (softened)
- 1 cup white sugar
- 2 large eggs
- ⅓ cup sour cream
- 1 teaspoon vanilla extract
- 1 tablespoon all-purpose flour
- 1 can cherry pie filling
Instructions
- Preheat your oven to 350°F.
- Line 18 muffin cups with foil-lined wrappers.
- In a medium bowl, mix the melted butter with graham cracker crumbs and press into the bottom of each cupcake liner.
- In a large bowl, beat the softened cream cheese with the white sugar until smooth.
- Add the eggs one at a time, beating after each addition.
- Blend in the sour cream, vanilla extract, and flour until well combined.
- Spoon the cheesecake mixture into each lined cup, filling them halfway.
- Bake for 20 to 25 minutes until the center is slightly jiggly.
- Let them cool in the pan for 20 minutes before chilling in the fridge for at least 2 hours.
- Top with cherry pie filling before serving.
Notes
For a chocolate twist, substitute graham cracker crumbs with Oreos for the crust.
Nutrition
- Serving Size: 1 cheesecake
- Calories: 180
- Sugar: 12g
- Sodium: 200mg
- Fat: 10g
- Saturated Fat: 6g
- Unsaturated Fat: 4g
- Trans Fat: 0g
- Carbohydrates: 20g
- Fiber: 0g
- Protein: 3g
- Cholesterol: 30mg