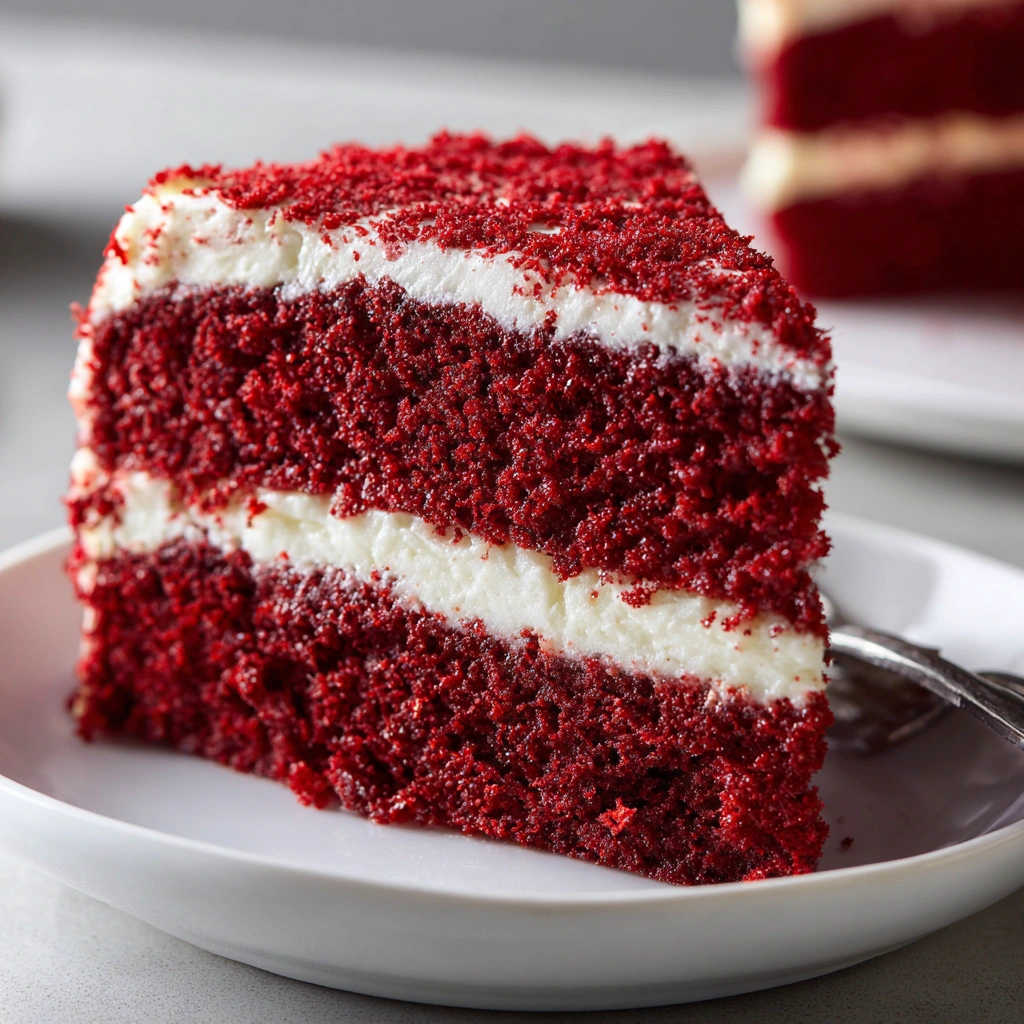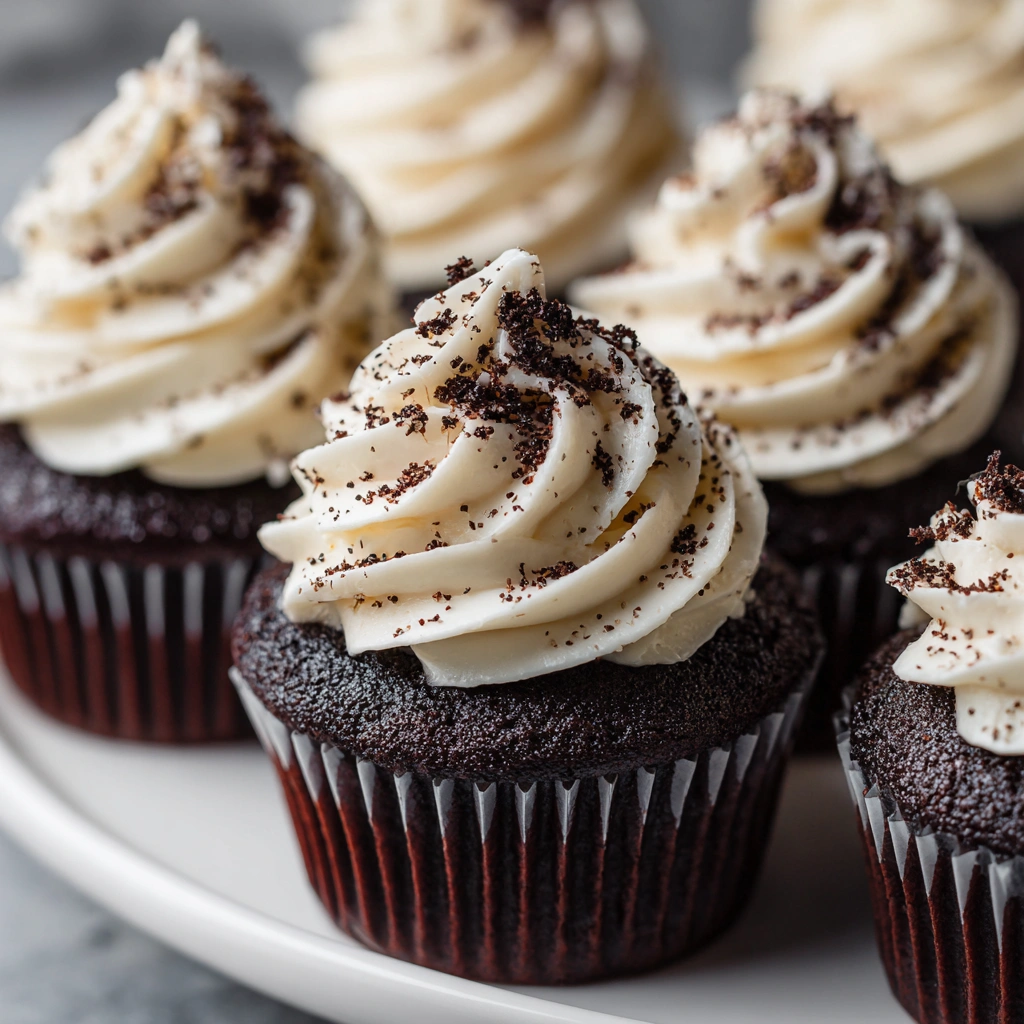
Introduction to Black Velvet Cupcakes
As a busy mom, I know how precious time can be, especially when it comes to whipping up something special in the kitchen. That’s where these delightful Black Velvet Cupcakes come in! They’re not just a treat; they’re a quick solution for those days when you want to impress your loved ones without spending hours in the kitchen. With their rich chocolate flavor and a hint of vanilla, these cupcakes are sure to bring smiles all around. Trust me, once you try them, they’ll become a go-to recipe for any occasion!
Why You’ll Love This Black Velvet Cupcakes
These Black Velvet Cupcakes are a dream come true for busy lives! They’re incredibly easy to make, taking just 40 minutes from start to finish. The taste? Oh, it’s a heavenly blend of rich chocolate and subtle vanilla that dances on your taste buds. Plus, they’re perfect for any occasion, whether it’s a birthday party or a cozy family dinner. You’ll love how they impress without the stress!
Ingredients for Black Velvet Cupcakes
Let’s dive into the ingredients that make these Black Velvet Cupcakes so irresistible! Each component plays a vital role in creating that rich, decadent flavor.
- All-purpose flour: This is the backbone of our cupcakes, providing structure and a light texture.
- Granulated sugar: Sweetness is key! It not only sweetens but also helps create a moist crumb.
- Unsweetened cocoa powder: This is where the chocolate magic happens, giving our cupcakes that deep, rich flavor.
- Baking soda: A leavening agent that helps the cupcakes rise, making them fluffy and light.
- Salt: Just a pinch enhances all the flavors, balancing the sweetness beautifully.
- Buttermilk: This adds moisture and a slight tang, making the cupcakes tender and delicious.
- Vegetable oil: It keeps the cupcakes moist and adds richness without the heaviness of butter.
- Large eggs: Eggs provide structure and stability, helping the cupcakes hold their shape.
- Vanilla extract: A splash of vanilla adds warmth and depth to the flavor profile.
- Red food coloring: This is the secret twist! It gives the cupcakes their signature black velvet appearance.
For those looking to make substitutions, you can use whole wheat flour for a healthier option or almond milk in place of buttermilk for a dairy-free version. If you want to skip the food coloring, that’s perfectly fine too! Just remember, the exact measurements for these ingredients are at the bottom of the article, ready for you to print out and keep handy.
How to Make Black Velvet Cupcakes
Now that we have our ingredients ready, let’s dive into the fun part—making these Black Velvet Cupcakes! Follow these simple steps, and you’ll have a batch of delicious cupcakes in no time.
Step 1: Preheat the Oven
First things first, preheat your oven to 350°F (175°C). This step is crucial because it ensures that your cupcakes bake evenly. While the oven heats up, line your cupcake pan with paper liners. This not only makes for easy cleanup but also adds a lovely touch to your presentation.
Step 2: Mix Dry Ingredients
In a large bowl, whisk together the all-purpose flour, granulated sugar, unsweetened cocoa powder, baking soda, and salt. Make sure to mix them well! This step is essential for achieving a light and fluffy texture. If you see any lumps, break them up with your whisk. A well-mixed dry mixture sets the stage for a perfect cupcake!
Step 3: Combine Wet Ingredients
In another bowl, mix the buttermilk, vegetable oil, eggs, vanilla extract, and red food coloring. Whisk until everything is well combined. The buttermilk adds moisture, while the oil keeps the cupcakes rich and tender. The red food coloring is what gives our Black Velvet Cupcakes their signature look, so don’t skip this step!
Step 4: Combine Wet and Dry Mixtures
Now, it’s time to bring the two mixtures together. Gradually add the wet ingredients to the dry ingredients. Gently fold them together until just combined. Be careful not to overmix! Overworking the batter can lead to dense cupcakes, and we want them light and airy.
Step 5: Fill Cupcake Liners
Using a spoon or a cookie scoop, fill each cupcake liner about two-thirds full with the batter. This allows room for the cupcakes to rise without overflowing. If you want perfectly even cupcakes, try to fill them all to the same level. It’s a small detail that makes a big difference!
Step 6: Bake the Cupcakes
Place the cupcake pan in the preheated oven and bake for 18-20 minutes. To check for doneness, insert a toothpick into the center of a cupcake. If it comes out clean or with a few crumbs, they’re ready! If there’s wet batter on the toothpick, give them a few more minutes.
Step 7: Cool the Cupcakes
Once baked, allow the cupcakes to cool in the pan for about 5 minutes. This helps them set and makes it easier to remove them without breaking. After that, transfer them to a wire rack to cool completely. Cooling is important because it prevents the frosting from melting when you top them!
Tips for Success
- Always measure your ingredients accurately for the best results.
- Use room temperature eggs and buttermilk for a smoother batter.
- Don’t skip the cooling step; it’s crucial for perfect frosting.
- Experiment with different frostings like cream cheese or chocolate ganache.
- For a fun twist, add chocolate chips to the batter!
Equipment Needed
- Standard cupcake pan (a muffin tin works too!)
- Paper cupcake liners (silicone liners are a great reusable option)
- Mixing bowls (any size will do, just make sure they’re sturdy)
- Whisk (a fork can work in a pinch)
- Measuring cups and spoons (kitchen scale for precision is a bonus)
Variations of Black Velvet Cupcakes
- Red Velvet Twist: Add a bit more red food coloring for a vibrant red velvet version that’s just as delicious!
- Gluten-Free Option: Substitute all-purpose flour with a gluten-free blend to make these cupcakes suitable for gluten-sensitive friends.
- Vegan Delight: Replace eggs with flax eggs and use almond milk instead of buttermilk for a plant-based treat.
- Chocolate Chip Surprise: Fold in some mini chocolate chips for an extra chocolatey burst in every bite.
- Spiced Up: Add a pinch of cinnamon or espresso powder to the dry ingredients for a warm, spiced flavor.
Serving Suggestions for Black Velvet Cupcakes
- Pair with a scoop of vanilla ice cream for a delightful contrast.
- Serve alongside fresh berries for a pop of color and freshness.
- Drizzle with chocolate sauce for an extra indulgent touch.
- Top with a dollop of whipped cream for a light finish.
- Present on a decorative platter for a stunning display at gatherings.
FAQs about Black Velvet Cupcakes
As I’ve baked these Black Velvet Cupcakes countless times, I’ve gathered a few common questions that pop up. Let’s dive into them!
Can I make these cupcakes ahead of time?
Absolutely! You can bake the cupcakes a day in advance. Just store them in an airtight container at room temperature. They’ll stay fresh and delicious!
What’s the best frosting for Black Velvet Cupcakes?
I recommend cream cheese frosting for a tangy contrast to the rich chocolate flavor. However, chocolate ganache or vanilla buttercream also works beautifully!
Can I use a different type of flour?
Yes! You can substitute all-purpose flour with whole wheat flour or a gluten-free blend. Just keep in mind that the texture may vary slightly.
How do I store leftover cupcakes?
Store any leftovers in an airtight container at room temperature for up to three days. If you want to keep them longer, freeze them for up to two months!
Can I add mix-ins to the batter?
Definitely! Feel free to fold in mini chocolate chips or nuts for added texture and flavor. Just be careful not to overmix!
Final Thoughts
Making Black Velvet Cupcakes is more than just baking; it’s about creating moments of joy and connection. Each bite is a celebration of rich flavors that can brighten even the busiest of days. Whether you’re sharing them with family or enjoying a quiet moment with a cup of coffee, these cupcakes bring a touch of indulgence to everyday life. I hope you find as much happiness in baking and sharing these delightful treats as I do. So, roll up your sleeves, gather your ingredients, and let the magic of Black Velvet Cupcakes fill your kitchen with love!
Print
Black Velvet Cupcakes: Indulge in Decadent Delight!
- Prep Time: 20 minutes
- Cook Time: 20 minutes
- Total Time: 40 minutes
- Yield: 12 cupcakes 1x
- Category: Dessert
- Method: Baking
- Cuisine: American
- Diet: Vegetarian
Description
Black Velvet Cupcakes are a rich and decadent dessert that combines the classic flavors of chocolate and vanilla with a unique twist, perfect for any occasion.
Ingredients
- 1 1/2 cups all-purpose flour
- 1 cup granulated sugar
- 1/2 cup unsweetened cocoa powder
- 1 teaspoon baking soda
- 1/2 teaspoon salt
- 1 cup buttermilk
- 1/2 cup vegetable oil
- 2 large eggs
- 1 teaspoon vanilla extract
- 1 tablespoon red food coloring
Instructions
- Preheat the oven to 350°F (175°C) and line a cupcake pan with paper liners.
- In a large bowl, whisk together the flour, sugar, cocoa powder, baking soda, and salt.
- In another bowl, mix the buttermilk, vegetable oil, eggs, vanilla extract, and red food coloring until well combined.
- Gradually add the wet ingredients to the dry ingredients, mixing until just combined.
- Fill each cupcake liner about 2/3 full with the batter.
- Bake for 18-20 minutes or until a toothpick inserted in the center comes out clean.
- Allow the cupcakes to cool in the pan for 5 minutes, then transfer to a wire rack to cool completely.
Notes
- For an extra touch, top with cream cheese frosting.
- Store leftovers in an airtight container at room temperature for up to 3 days.
- These cupcakes can be frozen for up to 2 months.
Nutrition
- Serving Size: 1 cupcake
- Calories: 250
- Sugar: 20g
- Sodium: 200mg
- Fat: 12g
- Saturated Fat: 2g
- Unsaturated Fat: 8g
- Trans Fat: 0g
- Carbohydrates: 35g
- Fiber: 1g
- Protein: 3g
- Cholesterol: 30mg