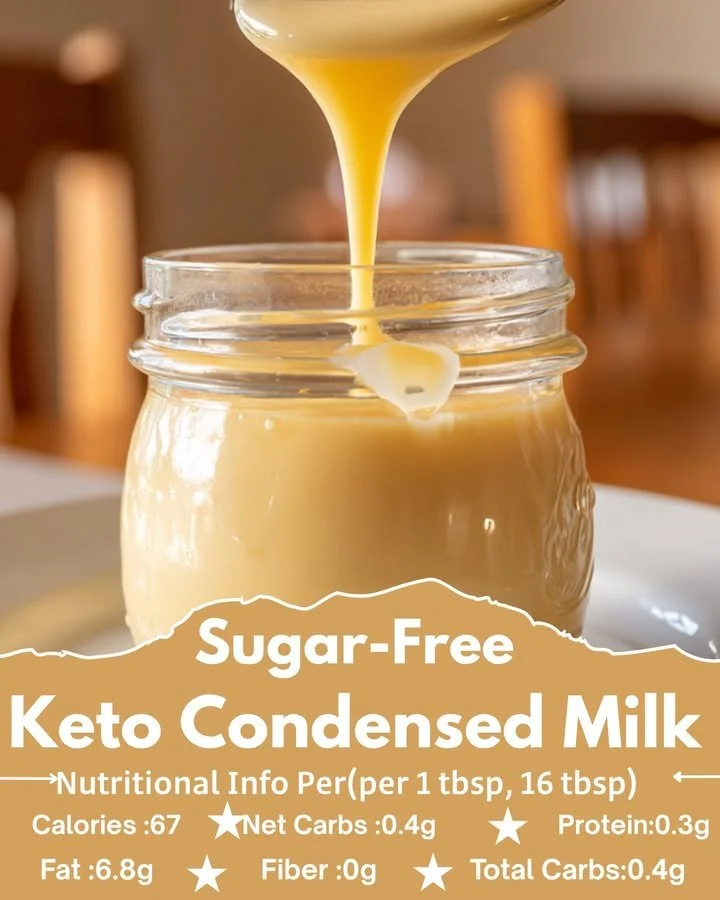
The sweet aroma of condensed milk wafts through the air, evoking memories of creamy desserts and indulgent treats that once seemed out of reach for those of us on a low-carb journey. Imagine a velvety, luscious concoction that drapes everything it touches in silky sweetness. Picture a dollop of this sugar-free keto condensed milk coaxing life into your coffee or languishing lovingly atop a pile of crisp, buttery pancakes. Each spoonful promises a delightful experience that dances in your mouth, leaving only satisfaction in its wake.
Let’s take one step closer to achieving this dreamy delight. With the right ingredients and a little bit of patience, you can recreate a sugar-free version that captures all the essence of traditional condensed milk without the guilt. Your mornings will transform into a reverie of flavors, and dessert becomes an open canvas for creativity. The best part? You hold the power to indulge without straying off your dietary path.
Why You’ll Love This Sugar-Free Keto Condensed Milk
What makes this recipe stand out in the sea of sugar-laden alternatives is its rich texture and luscious taste—without a hint of guilt. Using allulose, a low-calorie sweetener, allows you to enjoy that sweet creaminess without the blood sugar spike. This keto condensed milk serves as a fantastic addition to coffee, smoothies, or baked goods. It makes the most decadent whipped toppings, adding luxurious flavor to fresh berries or keto-friendly pancakes. You could even drizzle it gently over a slice of low-carb cheesecake, creating a dessert experience that feels indulgent without the sugar hangover.
This recipe flourishes in its versatility, too. Use it to whip up a rich keto fudge, blend it into a luscious custard, or even simply enjoy it straight from the jar as a sweet treat. Whether you’re satisfying a sweet craving or enhancing your favorite dishes, this sugar-free condensed milk fits seamlessly into your lifestyle while elevating your culinary adventures.
Preparation Phase & Tools to Use
Before diving into the heart of the recipe, let’s gather the essential tools that will enhance your cooking experience. The right utensils will make your task smoother and your final result more delicious.
-
Heavy-Bottomed Saucepan: This type of pan disperses heat evenly, reducing the risk of burning the delicate mixture and ensuring an even cook. It’s an invaluable companion in this journey to creating a perfect condensed milk.
-
Whisk: A good whisk helps integrate all the ingredients smoothly, ensuring that your condensed milk remains velvety and free from lumps.
-
Measuring Cups: Precision is crucial! Use clear measuring cups for accuracy in both the liquid and dry ingredients.
-
Heatproof Spoon or Spatula: This tool will aid in scraping the sides of the saucepan, capturing every bit of that creamy goodness as it cooks to perfection.
-
Glass Jar: For storage, a clean 8 oz glass jar showcases your creation beautifully while keeping it fresh for later use.
With these tools in hand, your preparation will become a seamless process, allowing you to focus on enjoying the delightful results.
Ingredients for Sugar-Free Keto Condensed Milk
Let’s explore the surprisingly simple yet impactful ingredients that make this recipe sing.
-
1 cup heavy whipping cream: This rich base offers a silky texture that forms the heart of the condensed milk. If you prefer a lighter version, you can use coconut cream for a dairy-free option.
-
1/3 cup allulose: A low-calorie sweetener that closely mimics the sweetness and texture of sugar without the carb load. If you can’t find allulose, erythritol can serve as a substitute but may crystallize more than allulose.
-
1 tbsp unsalted butter: A touch of butter adds richness and depth to the flavor, elevating the overall indulgence of the milk.
-
1/2 tsp unsweetened pure vanilla powder: Vanilla essence lends a fragrant aroma, enhancing the sweet notes of the condensed milk. You could also replace it with vanilla extract, but ensure it’s unsweetened.
How to Make Sugar-Free Keto Condensed Milk
Creating this luxurious mixture involves a simple yet rewarding process. Follow these step-by-step instructions to achieve the perfect consistency:
-
Combine the heavy cream and allulose in a small heavy-bottomed saucepan. Ensure you measure precisely for the best results.
-
Heat over medium-low, whisking gently until the allulose dissolves completely. Keep a keen eye on it; you want sweet smoothness, not sticky clumps.
-
Reduce heat to low once the mixture begins to steam, fostering that gentle simmer.
-
Maintain a very gentle simmer; do not boil vigorously. This slow cooking enhances the flavors while preventing the cream from scorching.
-
Cook uncovered for 20–30 minutes, stirring every 2–3 minutes. Patience pays off here—each stir helps develop the texture.
-
Scrape the bottom and sides often so the cream stays smooth. You’ll notice the mixture becoming thicker and richer with each stir.
-
Remove from heat when about 15 tablespoons remain. It should look thickened yet still slightly thinner than your desired final texture.
-
Whisk in the butter and vanilla until the mixture turns glossy and emulsified. Watch in awe as the creamy concoction transforms right before your eyes!
-
Cool for 15 minutes, stirring once or twice to ensure even cooling.
-
Transfer your liquid gold to a clean 8 oz glass jar, pouring with care to prevent spills.
-
Cool completely before sealing the jar. Patience will yield the best results!
-
Refrigerate for at least 2 hours to thicken.
-
For a slow ribbon when serving, rest at room temperature for 10 minutes before using.
-
Store refrigerated for 7–10 days and stir before using. You’ll find new uses for it every day!
Chef’s Notes & Helpful Tips
Let’s elevate your cooking game with some helpful suggestions to embrace this recipe fully.
-
Make-ahead tips: Prepare a double batch and store it in the fridge for those spontaneous dessert times! It also allows the flavors to deepen over time.
-
Cooking alternatives: Although the stovetop works beautifully, you can also simmer it in a slow cooker on low. Just pay attention to the consistency, as it may thicken differently.
-
Customization ideas: Try adding a pinch of sea salt for an enticing salted caramel flavor or a splash of almond extract for an exquisite twist on the classic recipe. Infusing it with spices like cinnamon or nutmeg can also add depth.
Common Mistakes to Avoid
Even the best chefs encounter hiccups in the kitchen. Here are some common pitfalls to watch out for:
-
Boiling too quickly: Avoid vigorous boiling; this changes the texture and can result in a grainy end product.
-
Not stirring often: Regular stirring ensures smoothness; neglecting this will lead to a lumpy mixture.
-
Not scraping the sides and bottom: Ignoring this important step can create burnt bits in your condensed milk, which don’t enhance the flavor.
-
Cooling too quickly: Rushing the cooling process can affect the final thickness of your condensed milk. Allow it ample time in the cooling stage.
What to Serve With Sugar-Free Keto Condensed Milk
The possibilities are endless when it comes to pairing this rich treat! Consider indulging in:
-
Coffee: Drip it into your morning brew for a creamy, low-carb delight that enhances every sip.
-
Pancakes or Waffles: Transform your breakfast favorites with this luscious drizzle, creating a breakfast experience that feels like a hug.
-
Keto Desserts: Add it as a topping for keto cheesecakes or brownies to elevate their flavor and texture.
-
Smoothies: Blend into your morning smoothie for extra creaminess and a touch of sweetness without compromising your diet.
-
Fresh berries: Enjoy strawberries, blueberries, or raspberries drizzled with this silky treat for a refreshing and decadent snack.
-
Nuts: Coat raw or roasted nuts in this condensed milk and bake for a crispy, sweet snack that’s perfect for sharing.
Storage & Reheating Instructions
After creating this delicious concoction, you’ll want to ensure it lasts. Store your sugar-free keto condensed milk in an airtight glass jar in the fridge for 7–10 days. If you plan to keep it longer, consider freezing it in ice cube trays for convenient use later. Just remember to thaw it gently in the fridge when you wish to use it again.
To reheat, simply microwave in short bursts—taking care not to scorch the delicate concoction. Stir well before using to bring the creamy texture back to life.
Estimated Nutrition Information
While exact values may vary based on brands and measurements, you can expect roughly:
- Calories: 80 per serving (2 tablespoons)
- Fat: 8 g
- Carbohydrates: 1 g
- Fiber: 0 g
- Protein: 0 g
This recipe proves that you can enjoy sweetness and creaminess while staying low-carb! Remember, these values are approximations.
FAQs
Can I use a different sweetener?
Absolutely! While allulose works wonders, you can also try erythritol or monk fruit sweeteners. Just remember that they might produce slightly different textures.
How can I thicken it more?
If you desire a thicker condensed milk, continue to simmer until it reaches a desired consistency, but do be careful not to overcook it!
Can I use this recipe in baked goods?
Yes! This sugar-free condensed milk can substitute for regular condensed milk in baking recipes, elevating the dessert while keeping it keto-friendly.
Is this safe for diabetics?
Indeed! This recipe uses allulose, a sugar substitute that does not raise blood sugar levels, making it a perfect choice for diabetics.
What if my mixture becomes grainy?
Should this occur, simply whisk the mixture again gently while it simmers to help restore its smooth consistency.
Conclusion
Now that you possess the knowledge and the steps to create your very own sugar-free keto condensed milk, it’s time to embrace the joy of cooking. Let the process be a delightful discovery, and dive into the rich, creamy world that this luscious creation opens up for you. No sugar, no regrets—only the sweet taste of satisfaction awaits! So gather your ingredients, pull on that apron, and craft this delightful recipe. Trust me; every rich bite will create magic that lingers long after the last spoonful. Happy cooking!
Print
Sugar-Free Keto Condensed Milk
- Prep Time: 10 minutes
- Cook Time: 30 minutes
- Total Time: 40 minutes
- Yield: 8 servings (2 tablespoons each) 1x
- Category: Dessert
- Method: Stovetop
- Cuisine: Keto
- Diet: Keto, Low-Carb
Description
A luxurious sugar-free condensed milk perfect for coffee, pancakes, and desserts while staying low-carb.
Ingredients
- 1 cup heavy whipping cream
- 1/3 cup allulose
- 1 tbsp unsalted butter
- 1/2 tsp unsweetened pure vanilla powder
Instructions
- Combine the heavy cream and allulose in a small heavy-bottomed saucepan.
- Heat over medium-low, whisking gently until the allulose dissolves completely.
- Reduce heat to low once the mixture begins to steam.
- Maintain a gentle simmer; do not boil vigorously.
- Cook uncovered for 20–30 minutes, stirring every 2–3 minutes.
- Scrape the bottom and sides often to keep the cream smooth.
- Remove from heat when about 15 tablespoons remain.
- Whisk in the butter and vanilla until glossy and emulsified.
- Cool for 15 minutes, stirring once or twice.
- Transfer to a clean 8 oz glass jar and cool completely before sealing.
- Refrigerate for at least 2 hours to thicken.
- Serve at room temperature for a slow ribbon effect.
Notes
This recipe can be doubled and stored for spontaneous dessert times. Experiment with different flavors like almond extract or spices.
Nutrition
- Serving Size: 2 tablespoons
- Calories: 80
- Sugar: 0g
- Sodium: 20mg
- Fat: 8g
- Saturated Fat: 5g
- Unsaturated Fat: 3g
- Trans Fat: 0g
- Carbohydrates: 1g
- Fiber: 0g
- Protein: 0g
- Cholesterol: 30mg