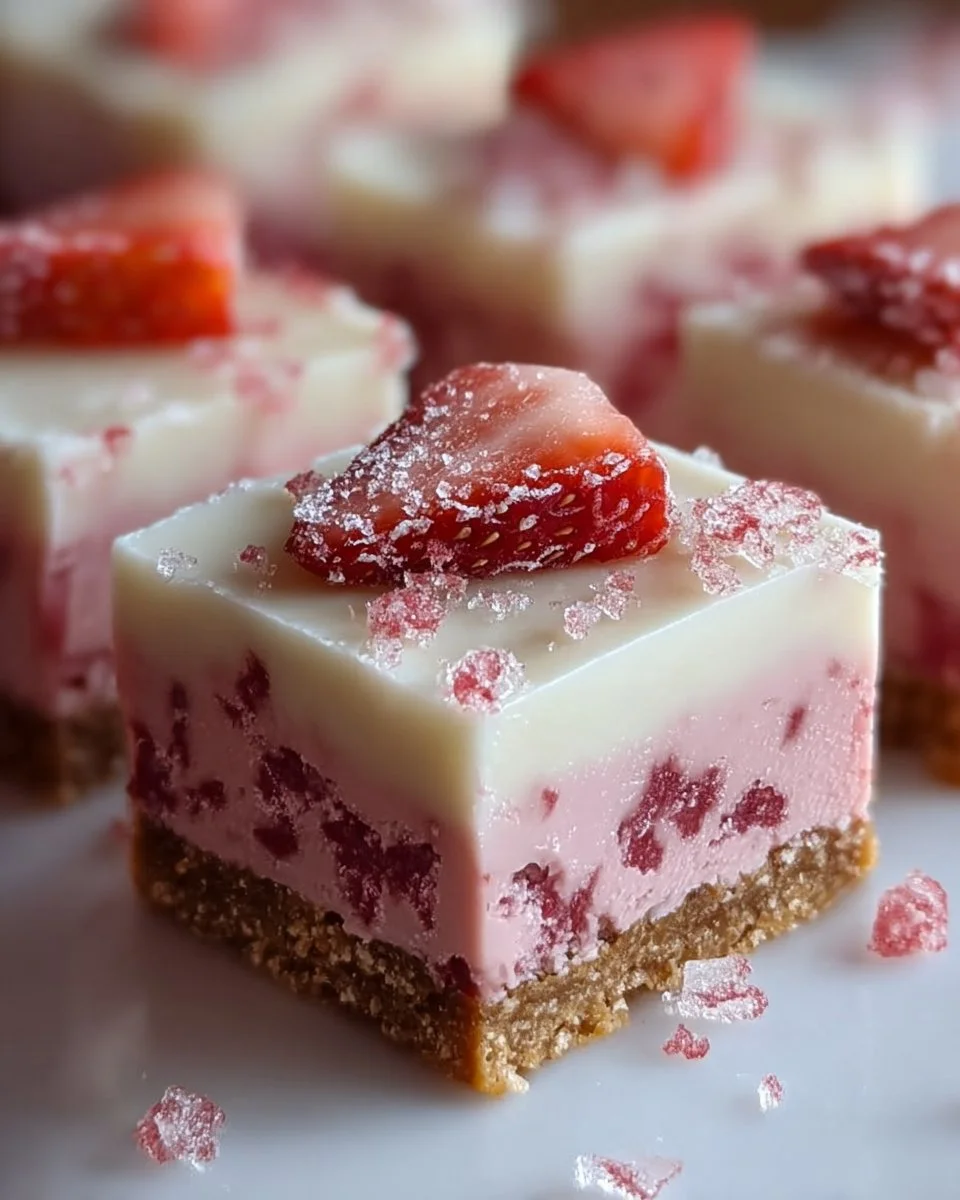
Picture this: a sunlit afternoon, the gentle warmth of summer wrapping around you like a soft blanket. You sink into a cozy chair, a plate of vibrant pink strawberry fudge squares perched nearby, their sweet aroma teasing your senses. As you take the first bite, a wave of creamy, rich white chocolate envelops your taste buds, the coolness of the fudge contrasting perfectly with a hint of luscious strawberry. Each mouthful dances between silken smoothness and just the right amount of crunch from the biscuit base, a symphony of sweetness that makes every moment feel like a celebration.
No-bake desserts often hold a special place in our hearts, requiring minimal effort while delivering maximum joy. With no need for an oven, these strawberry fudge squares promise an easy escape into a world of deliciousness. They’re perfect for spontaneous gatherings or quiet nights in. Each square is not just a treat; it’s an experience, a delightful bite of summer captured within layers of easy-to-make fudge.
Why You’ll Love This No-Bake Strawberry Fudge Squares Recipe
This recipe stands apart not only for its unforgettable flavor but also for its convenience. Made with only a handful of ingredients, these strawberry fudge squares offer an appealing combination of creaminess and crunch. The gentle sweetness of white chocolate pairs flawlessly with the tartness of strawberries, crafting a harmonious blend that tantalizes the palate.
Moreover, they’re incredibly versatile. Whether you are celebrating a birthday, hosting a picnic, or simply indulging your sweet tooth on a quiet evening, these squares make for the perfect dessert. Their stunning blush color and delightful presentation make them an inviting centerpiece for any occasion, sure to impress friends and family alike. So why wait? Treat yourself to a luscious experience that captures the essence of summer in every bite!
Preparation Phase & Tools to Use
Before diving into this delightful recipe, it’s essential to gather the right tools to ensure your sweet creation comes together effortlessly. Here’s what you will need:
- 8-Inch Square Baking Pan: This is your mold for the fudge, helping shape those perfect squares.
- Parchment Paper: Lining the baking pan makes removing the fudge a breeze, keeping it intact for a beautiful finish.
- Mixing Bowls: Use one large bowl for the crust and another heatproof bowl for the chocolate mixture.
- Spatula: An essential tool for mixing and spreading, ensuring your fudge is smooth and flawless.
- Double Boiler or Microwave: Choose your method for gently melting chocolate; both options ensure a creamy texture.
- Sharp Knife: A must for achieving those neat squares post chilling.
Preparation Tips: Before starting, ensure your butter is melted and your strawberries are ready. You can freeze-dry strawberries at home, or simply pick up some from your local store to save time. Don’t skip chilling the crust; it provides a sturdy foundation for the fudge.
Ingredients for No-Bake Strawberry Fudge Squares
- 7 oz digestive biscuits or graham crackers, finely crushed: These create the perfect buttery base. You can substitute with vanilla wafers for a different flavor profile.
- 3.5 oz unsalted butter, melted: Provides richness; be sure to use unsalted for proper balance.
- 7 oz white chocolate chips or chopped white chocolate: The creamy star of the show. Choose high-quality chocolate for the best results.
- 14 oz sweetened condensed milk (1 can): This gives the fudge its indulgent creaminess. Avoid evaporated milk, as the sweetness is key.
- 1.75 oz freeze-dried strawberries, ground to fine powder (or 3.5 oz fresh strawberries, puréed and strained): Freeze-dried strawberries offer concentrated flavor without excess moisture; fresh strawberries will work too, but be prepared for a slightly different texture.
- 1 tsp pure vanilla extract: A dash of vanilla elevates the flavor; always opt for pure extract for the best taste.
- Pinch of salt: Enhances sweetness and balances flavors.
- 1-2 drops pink or red gel food coloring (optional): For that extra pop of color.
- Fresh strawberry slices (for garnish): A beautiful, fresh touch atop your fudge.
- Extra freeze-dried strawberry pieces or coarse sugar crystals (for garnish): Adds visual appeal and crunch.
How to Make No-Bake Strawberry Fudge Squares
Prepare the Pan: Line an 8-inch square baking pan with parchment paper, allowing some overhang on two sides. This overhang is your handy tool for easy removal later.
Make the Crust: In a large bowl, combine the crushed digestive biscuits (or graham crackers) with the melted butter. Stir until every crumb is coated and holds together when pressed.
Press and Chill Crust: Firmly press the crumb mixture into the bottom of the prepared pan, ensuring an even layer. Chill in the refrigerator for about 10 minutes to set.
Melt Chocolate Base: Place the white chocolate chips and sweetened condensed milk in a medium heatproof bowl. Set this bowl over a saucepan filled with simmering water to create a double boiler. Stir gently until the mixture melts into a luscious, smooth consistency.
Add Strawberry Flavor: Remove from heat and stir in the freeze-dried strawberry powder (or strained purée), vanilla extract, salt, and food coloring if using. Mix until the color is uniform and the ingredients are fully combined.
Assemble the Fudge: Pour the strawberry fudge mixture over the chilled crust, spreading it evenly into the corners.
Chill Until Firm: Loosely cover the pan with plastic wrap and refrigerate for at least 2-3 hours, allowing the fudge layer to become firm to the touch.
Cut and Serve: Once set, lift the fudge out of the pan using the parchment overhang. Place it on a cutting board and slice into 16 squares, wiping the knife clean between cuts for a neat finish. Garnish each with a fresh strawberry slice or additional freeze-dried strawberry pieces for that extra flair.
Serve chilled or slightly softened at room temperature for the best experience.
Chef’s Notes & Helpful Tips
- Make-Ahead Tips: Prepare the fudge squares a day in advance. They store beautifully in the refrigerator, allowing the flavors to meld even more.
- Cooking Alternatives: You can also experiment with an air fryer for even quicker preparation. Just ensure your baking dish is air fryer-safe.
- Customization Ideas: Feel free to swap in different extracts like almond or lemon for a unique twist. Add nuts or coconut flakes into the crust for added texture.
Common Mistakes to Avoid
- Not Pressing the Crust Firmly Enough: A loose crust can lead to a crumbling fudge. Press it down firmly and evenly.
- Overheating the Chocolate: Ensure you do not allow the chocolate to scorch. Stir gently and keep the water simmering without boiling.
- Not Chilling Long Enough: Patience is key! Inadequate chilling time can lead to a soft fudge that doesn’t slice well.
What to Serve With No-Bake Strawberry Fudge Squares
Pair these delectable fudge squares with:
- Fresh Berries: A side of assorted fresh berries adds a refreshing touch.
- Whipped Cream: A dollop of whipped cream enhances the creamy texture.
- Vanilla Ice Cream: The warmth of ice cream juxtaposes beautifully with the cool fudge.
- Chocolate Sauce: Drizzle some chocolate sauce for an indulgent experience.
- Nutty Granola: A side of crunchy granola offers a delightful contrast.
- Mint Tea: A light mint tea brings a refreshing balance to the sweetness.
- Sparkling Water with Lime: A sparkling beverage cleanses the palate perfectly.
Storage & Reheating Instructions
Store any leftover fudge squares in an airtight container in the refrigerator for up to one week. For longer storage, place them in the freezer, wrapping each square in plastic wrap and then in aluminum foil for up to three months. To enjoy, thaw the squares in the refrigerator before serving.
Estimated Nutrition Information
Approximate values per serving (1 square) may include:
- Calories: 150
- Protein: 2g
- Carbs: 21g
- Fat: 7g
These values will vary based on specific brands and exact ingredients used.
FAQs
Can I use other fruits besides strawberries in this recipe?
Absolutely! You can use raspberries, blueberries, or even banana puree. Just adjust the sweetness as per taste.
Do I have to use freeze-dried strawberries?
Not at all! Fresh strawberries can work, though freeze-dried strawberries intensify the flavor without adding moisture.
Can I make this vegan?
Yes! Substitute the white chocolate with vegan chocolate, use coconut milk instead of condensed milk, and ensure your biscuits are dairy-free.
How do I ensure my fudge cuts cleanly?
Wipe the knife with a damp cloth between cuts to avoid the fudge sticking to the blade.
How can I add more texture to the fudge?
Consider adding chopped nuts or toasty coconut flakes to the fudge mixture for an extra delightful crunch.
Conclusion
These no-bake strawberry fudge squares promise to whisk you away to a summer paradise, even on the grayest of days. The delightful combination of creamy, fruity goodness wrapped in a buttery crust tantalizes every sweet tooth and brings smiles to faces of all ages. So, embrace the joy of simplicity without sacrificing flavor. Gather your ingredients, roll up your sleeves, and let this delightful recipe create lasting memories around your table. After all, isn’t food best when shared? Happy baking!
Print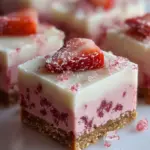
No-Bake Strawberry Fudge Squares
- Prep Time: 15 minutes
- Cook Time: 0 minutes
- Total Time: 180 minutes
- Yield: 16 squares 1x
- Category: Dessert
- Method: No-Bake
- Cuisine: American
- Diet: Vegetarian
Description
Delightful no-bake strawberry fudge squares that combine creamy white chocolate with the tartness of strawberries, all on a buttery biscuit base.
Ingredients
- 7 oz digestive biscuits or graham crackers, finely crushed
- 3.5 oz unsalted butter, melted
- 7 oz white chocolate chips or chopped white chocolate
- 14 oz sweetened condensed milk (1 can)
- 1.75 oz freeze-dried strawberries, ground to fine powder (or 3.5 oz fresh strawberries, puréed and strained)
- 1 tsp pure vanilla extract
- Pinch of salt
- 1–2 drops pink or red gel food coloring (optional)
- Fresh strawberry slices (for garnish)
- Extra freeze-dried strawberry pieces or coarse sugar crystals (for garnish)
Instructions
- Prepare the Pan: Line an 8-inch square baking pan with parchment paper, allowing some overhang on two sides.
- Make the Crust: In a large bowl, combine the crushed biscuits with the melted butter until well coated.
- Press and Chill Crust: Press the crumb mixture into the bottom of the prepared pan and chill in the refrigerator for about 10 minutes.
- Melt Chocolate Base: In a medium heatproof bowl over simmering water, melt the white chocolate chips and sweetened condensed milk until smooth.
- Add Strawberry Flavor: Remove from heat, stir in the strawberry powder, vanilla extract, salt, and food coloring if using.
- Assemble the Fudge: Pour the mixture over the chilled crust and spread evenly.
- Chill Until Firm: Cover the pan with plastic wrap and refrigerate for at least 2-3 hours to set.
- Cut and Serve: Lift the fudge out using the parchment overhang, slice into squares, and garnish as desired.
Notes
For best results, refrigerate overnight. The squares can be stored in an airtight container for up to one week.
Nutrition
- Serving Size: 1 square
- Calories: 150
- Sugar: 16g
- Sodium: 50mg
- Fat: 7g
- Saturated Fat: 4g
- Unsaturated Fat: 2g
- Trans Fat: 0g
- Carbohydrates: 21g
- Fiber: 1g
- Protein: 2g
- Cholesterol: 15mg